...
You must instruct the patient to contact the call center to have the appointment booked with you for them. If they do not contact the call center, the appointment will not be confirmed and you run the risk of having claims denied.
If the patient declines the appointment that is held for them, the call center does not have to select the held appointment and can select another appointment with a different provider if the patient chooses.
Check your schedule daily to ensure that your schedule is up to date and to ensure you can free up time for other patients if held appointment availability is not used
The Call Centerscan nothold availability for you. Only you or your scheduling admin can input your own held appointments for specific patients
| Table of Contents |
|---|
How to hold an appointment
Login to your Tridiuum ONE Connect app with your username and password.


Select the Scheduling tab in the green bar at the bottom.

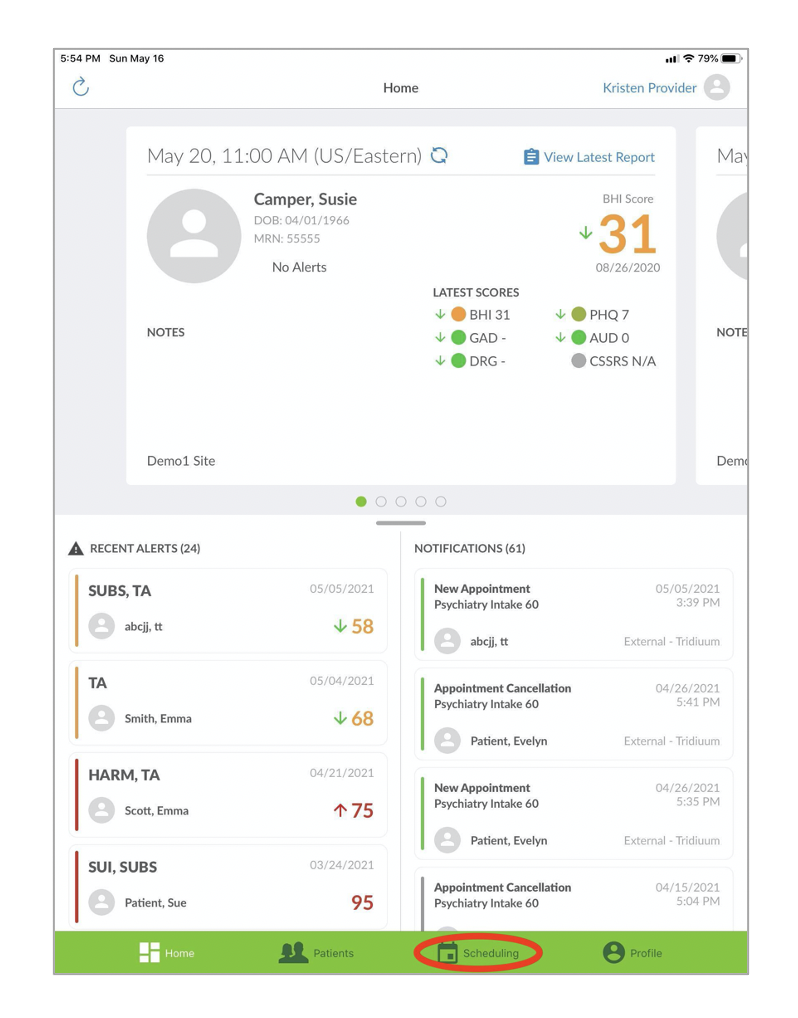
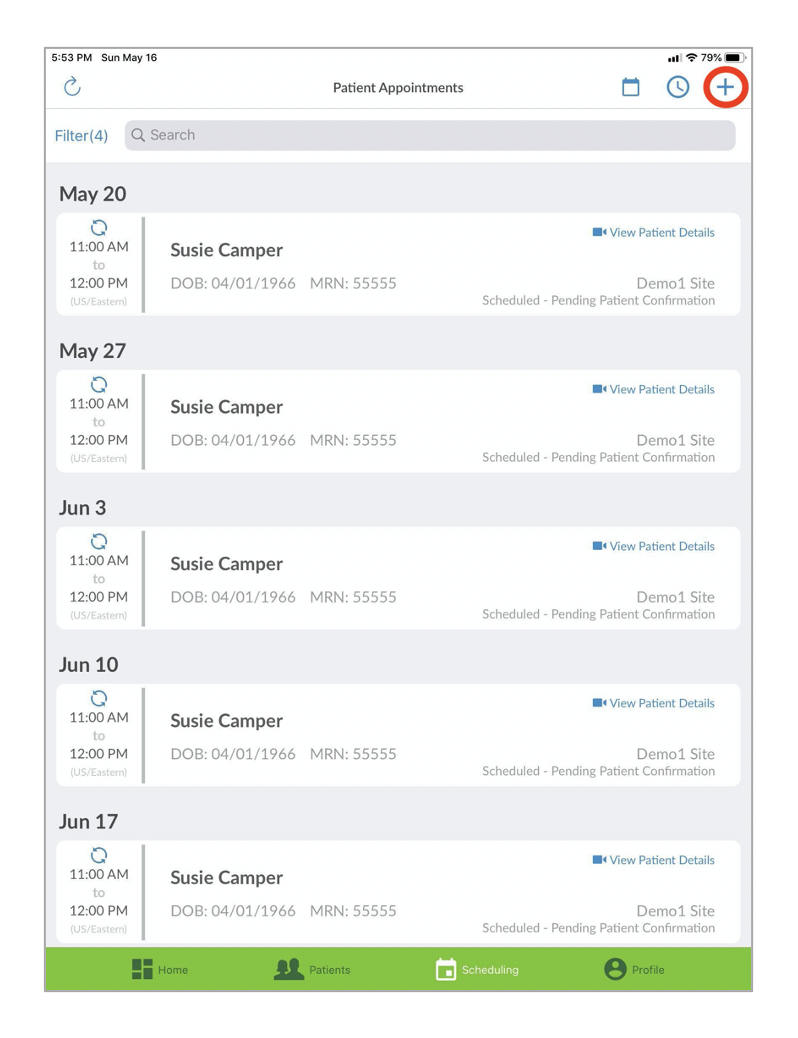
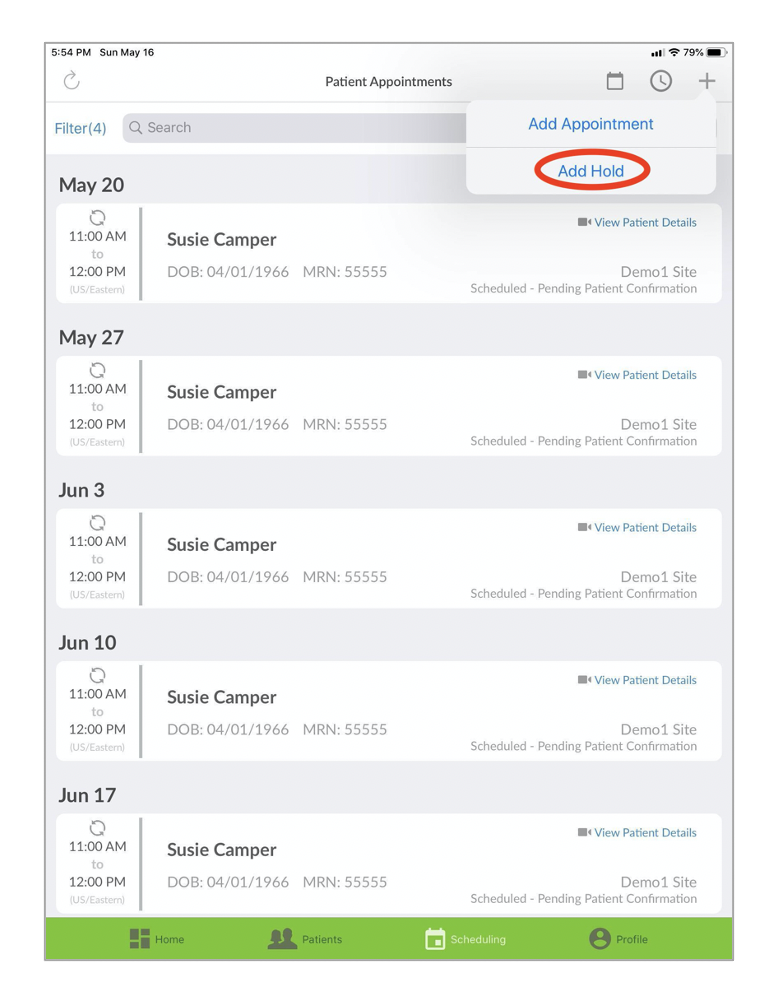
On the Scheduling - Patient Appointments screen, tap the +, and tap Add Hold.


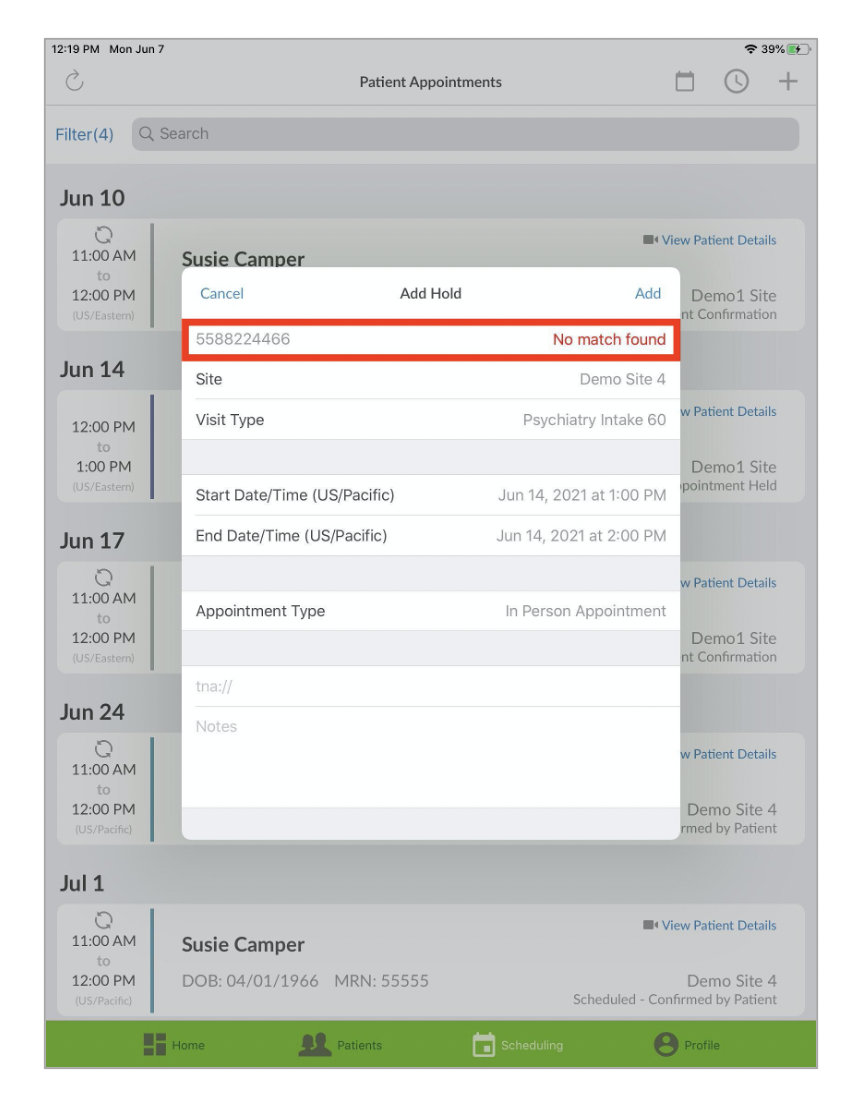
Type in the Patient MRN. Do not input any leading zeros when entering the MRN. If patient’s MRN is 00001234, input 1234 as the MRN. This must be their actual patient MRN - can not be a fake number ad this information is pulled from the organizations electronic health record system.
After you type in the patient MRN, you must tap the next section (such ad Site, Visit Type or the other section) and the system will start searching for the patient in the organizations EHR. If the patient is not found, you will receive a red notification stating No match found. Simply, retype the patient MRN if it was input incorrectly or contact your organization to receive the correct MRN for the patient. Once the patient is found, their name, date of birth, and MRN will appear.
Incorrect MRN:

Correct MRN:

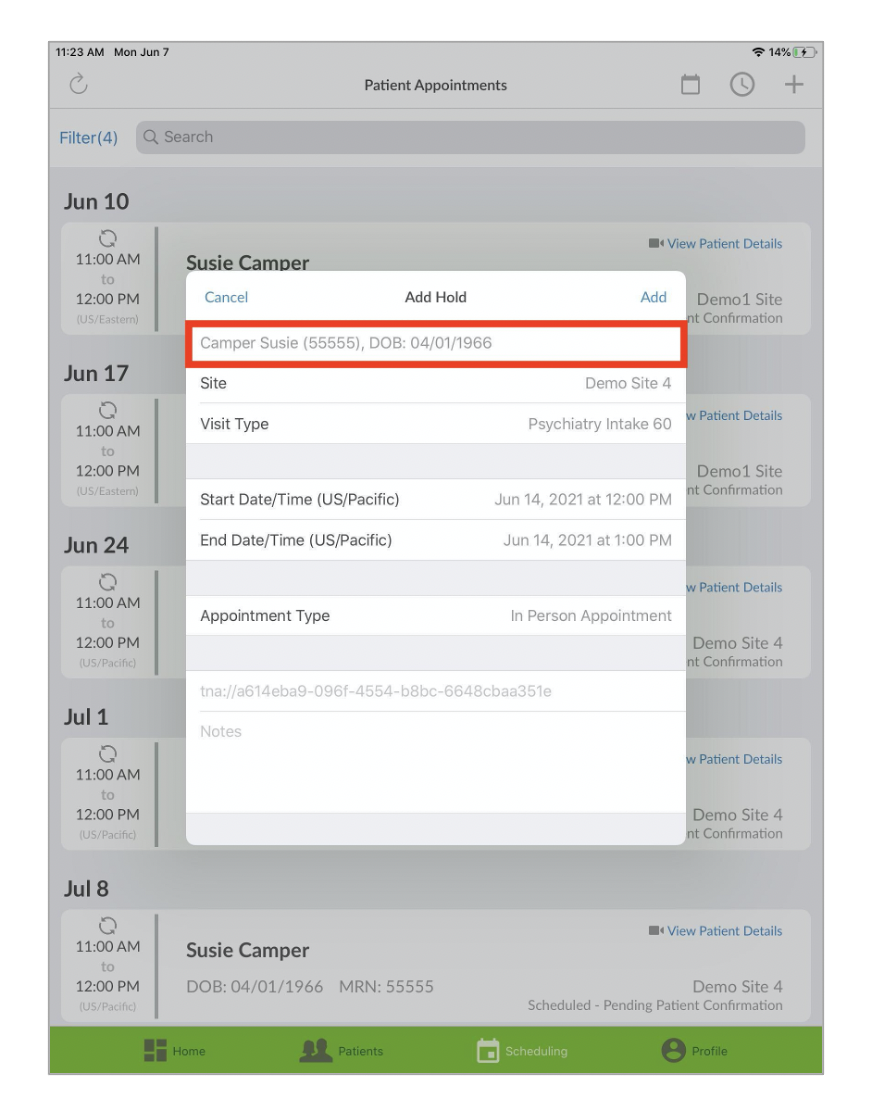
Once the patient MRN has been verified, select the Site you would like to see the patient at. Add the Start Date/Time and End Date/Time you’d like to meet with the patient (can only be made in 1 hour increments), and tap Add in the right hand corner to add your hold.


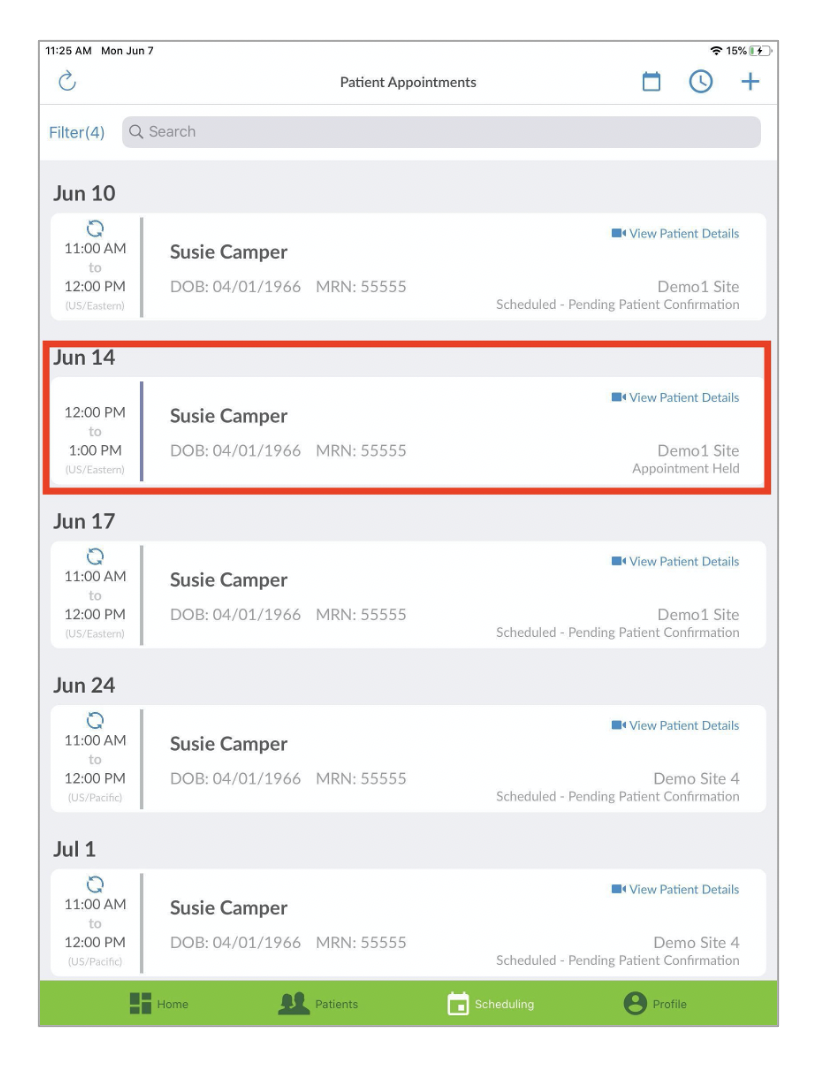
The patient’s held appointment will be added to your Patient Appointments list. The appointment appears with a purple line next to it to verify it is on hold.

When appointment is booked through the Call Center
...